
You presumably formerly know that Adobe Illustrator is a veritably important graphic design tool that allows you to produce vector plates. One of the most common tasks in graphic design that you can do with Adobe Illustrator is removing the background from an image. So do you wonder how to exercise that? In this composition, I will help you explore three different styles for removing a background from an image in Illustrator using a Cutting Mask, using an Image Trace, and using the Selection Feature.
Contents
Using Cutting Mask to Remove Background in Ai
Cutting Mask is one of the useful tools in Illustrator that allows you to mask out corridor of an image. I personally use this tool veritably frequently in my design process. Thus, I’ll show you step by step how to abolish the background using a Cutting Mask:
Step 1 – Open Adobe Illustrator and import the image you want to edit. You can do this by clicking on “File” in the top menu bar and opting “Open”. Also, navigate to the position of the image train and elect it.
Step 2 – Produce a new subcaste by clicking on the “New Layer” button in the Layers panel. This will ensure that the original image remains untouched and you can work on a separate subcaste.
Step 3 – Select the Pen Tool from the toolbar on the left- hand side of the screen. The Pen Tool is used to draw paths around the object you want to keep in the image.
Step 4 – Use the Pen Tool to draw a path around the object you want to keep in the image. Be sure to close the path by clicking on the starting point.
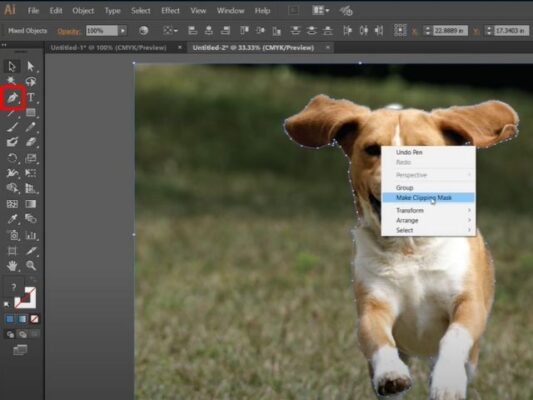
Step 5 – Once you have drawn the path, select both the path and the image. You can do this by holding down the Shift key and clicking on both objects.
Step 6 – Right– click on the selection and choose “Make Clipping Mask” from the context menu. This will mask out the background of the image and leave only the object you want to keep.
Step 7 – The background of the image should now be removed, leaving only the object you want to keep.
Using Image Trace to Remove the Background
Image Trace is another important tool in Illustrator used to convert raster images into vector images. You can also simply remove the background with Image Trace. Here are the way to remove background using Image Trace as I’ve epitomized them
Step 1 – Open Adobe Illustrator and import the image you want to edit. You can do this by clicking on “File” in the top menu bar and opting “Open”. Also, navigate to the position of the image train and select it.
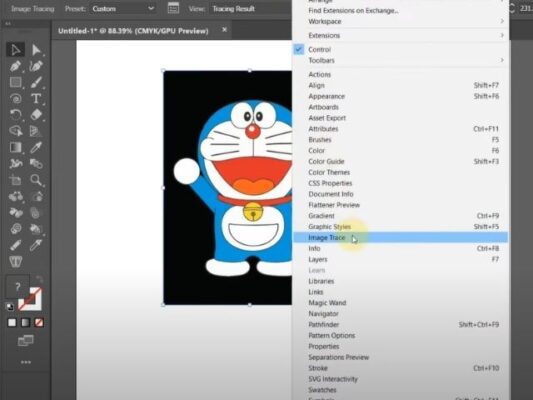
Step 2 – Select the image and click on the “Image Trace” button in the Control panel. This will open the Image Trace panel.
Step 3 – Choose the “Black and White” option from the Image Trace panel. This will convert the image to black and white.
Step 4 – Acclimate the threshold until the background is fully white and the object you want to keep is fully black. You can do this by moving the slider in the Threshold section of the Image Trace panel.
Step 5 – Click on the “Expand” button in the Control panel to convert the image into a vector image. This will produce a new vector object that you can edit.
Step 6 – The background of the image should now be removed, leaving only the object you want to keep.
Using the Select Feature in Illustrator
Eventually, the Select Feature in Illustrator also allows you to select and cancel the corridor of an image. This feature will help you save further time in removing the background of your image. The way to remove the background using the Select Feature are also veritably simple, let’s follow along:
Step 1 – Open Adobe Illustrator and import the image you want to edit. You can do this by clicking on “File” in the top menu bar and opting “Open”. Also, navigate to the position of the image train and select it.
Step 2 – Select the image and click on the “Select” button in the Control panel. This will open the Select panel.
Step 3 – Choose the “Object” option from the Select panel. This will allow you to select the entire object.
Step 4 – Use the “Magic Wand” tool to select the background you want to remove. You can do this by clicking on the background with the Magic Wand tool.
Step 5 – Press the “Delete” key on your keyboard to remove the named background. This will delete the named area and leave only the object you want to keep.
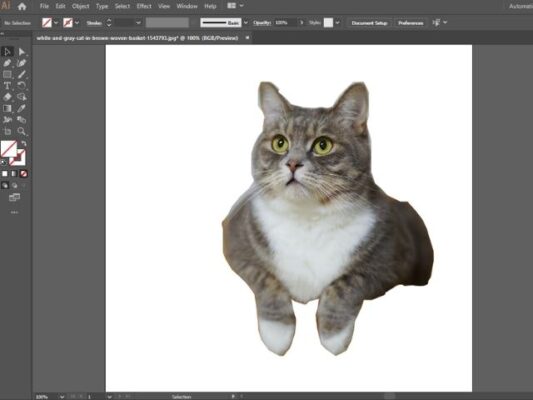
Step 6 – The background of the image should now be removed, leaving only the object you want to keep.
Conclusion
Removing background from an image is an essential task in graphic design. Through this composition, I have helped you more understand three different methods to remove a background from an image in Illustrator using a trimming mask, using an image trace, and using the selection feature. All three methods have their own advantages and disadvantages and each system will be suitable for different images, depending on the complexity of the image. In general, with these methods you can fluently remove the background from any image and produce stunning plates in Illustrator. Try to exercise regularly and you’ll come more complete with these tools. Good luck!
Related Posts